furrycat's 3D Studio MAX weapon modding tutorial
Applying materials
Select your gun, apply the Edit Mesh modifier, activate Sub-object mode and choose to edit by Face.
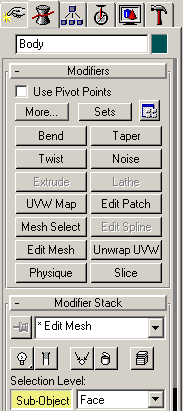
Select the muzzle polygon. At the bottom of the modifier menu (on the right) you will see a section headed Material ID. Type 2 into the box and press enter. Then hit the Hide button just above. The polygon will disappear (it's been hidden). Now select the whole of the rest of the model (Hint: use Select All from the Edit menu after setting Sub-Object Face mode). The Material ID should show up as 1. Set it to 1 if it does not. Finally hit Unhide All and leave Sub-object mode.
Incidentally, if you haven't figured out why you just set the muzzle polygon to material 2, it's to match the material you made in the material editor. The rest of the model is material 1, meaning it gets the texture you chose.
Now we need to Physique the model. This basically means associating it with a set of bones. When you Physique a mesh, you can manipulate it by moving the bones about. The SWAT3 game engine doesn't want anything to do with moving a bunch of polygons about. It moves bones. By Physiquing the gun to the Rifle_Root bone you made earlier you allow the game to point the gun (at the bad guys!).
First we need to align the bone with the weapon. If the bone from the template is too long, you can delete it and create another one, as shown below.
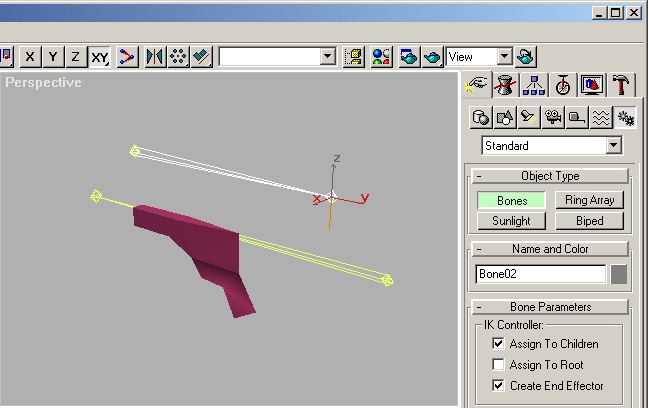
Select the bone and make sure it is named "Rifle_Root" - the name is actually irrelevant but as you will see later, you need to match it against properties of the mesh, so you need to ensure it has the name you expect it to have. Also, Rifle_Root is the standard name recommended in the Mod HQ documentation.
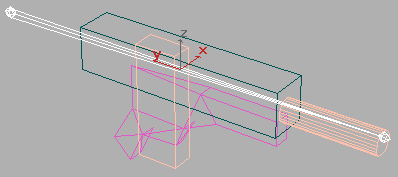 Move it so one end lines up roughly with the end of the barrel and the
other sticks out of the back (round where the weapon's stock goes if it
has one). Note that it is NOT necessary to make the alignments exact, nor does
the bone have to be the same length as the weapon. It is, however, easier to
work with if it is roughly the same size.
Next you must Physique the model using the Physique modifier. If you don't see it on your menu, do yourself a favour and go and read the Polycount tutorials I referred you to earlier. One of the tutorials describes how to find the Physique modifier and attach it to the menu.
Select the weapon mesh and apply the Physique modifier. Now press the leftmost button in the Physique menu. It's called Attach To Node. Then you must select the Rifle_Root bone. If your view is not obscured you can click on it directly but it's usually easier to select it by name.
When you've chose the bone, the following window pops up (I've overlaid a diagram of the Physique modifier options which appears on the right, in the tools section). Make sure you choose Rigid vertex-link assignment, No blending between links and no envelopes.
To test the physique, select the Rifle_Root bone and do stuff to it. Move it about, resize it, whatever. You should see the mesh move with it. UNDO your changes after playing (but don't undo so far that the mesh loses the physique!).
There's now only one more thing to do. Right-click on the model, choose Properties, and enter the following in the User-Defined tab.
SkeletonRoot=Rifle_Root
CreateGrip=GRIPPER_TEMPLATE1 As Grip1
CreateGrip=GRIPPER_TEMPLATE3 As Grip3
Note that Rifle_Root must match the name of the bone. As I said before, it doesn't actually matter what the bone is called as long as you put the right name in the SkeletonRoot part above. The exporter won't let you save the model if you get it wrong but it's nice to know why it isn't working!
If you like, you can export the model to SWAT3 now. Move on to the next section for instructions.
Jump to a section
| intro | part 1: First steps | part 2: Making the mesh | part 3: Defining materials | part 4: Applying materials | part 5: Exporting the model |
